


Creating a Facebook Application
To create a Facebook App, visit: https://developers.facebook.com/
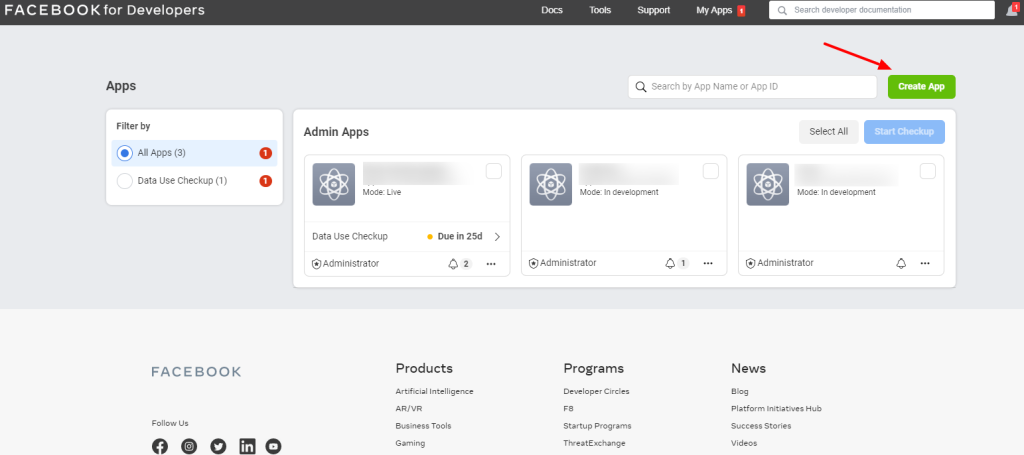
Step 1:
Click on the “Create New App/Add a New App” link.
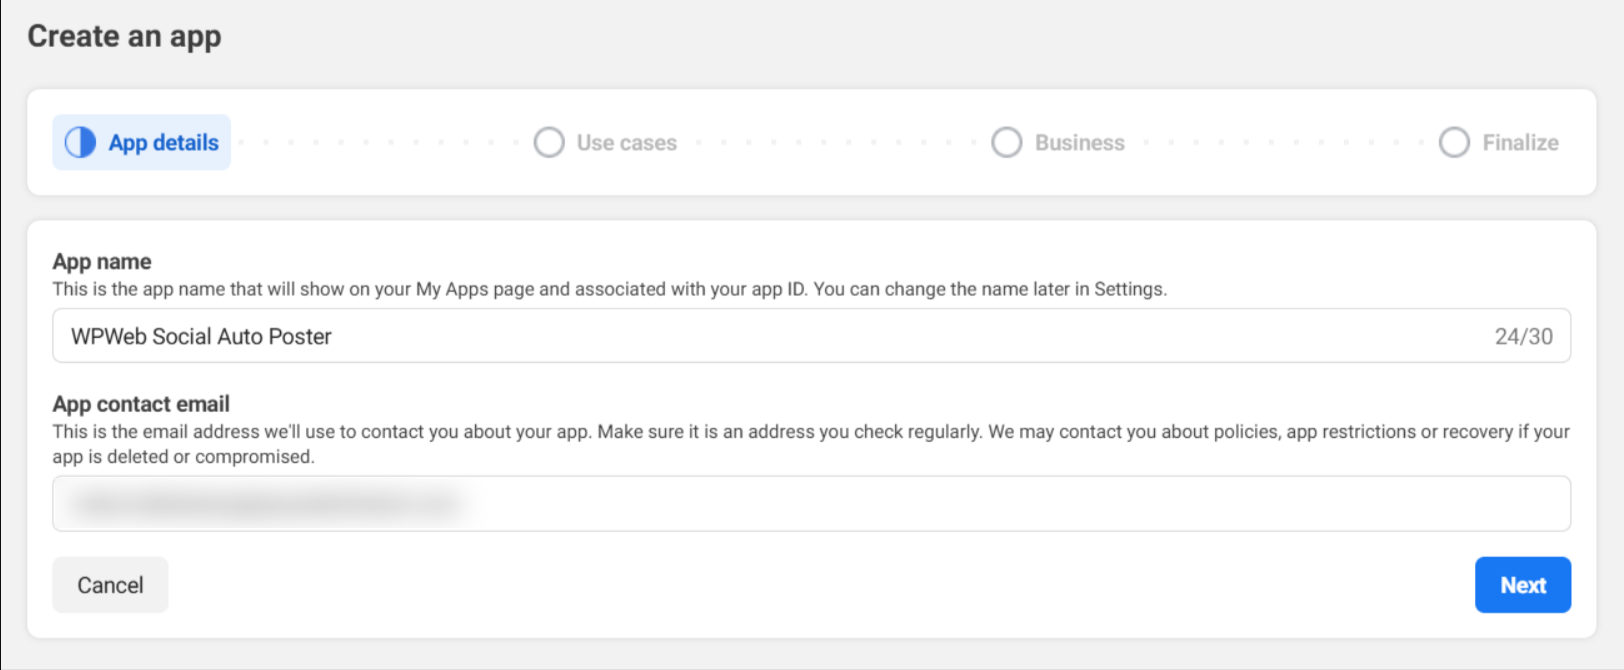
Step 2:
Enter the App Display Name and the contact email and click the “Create App ID”.
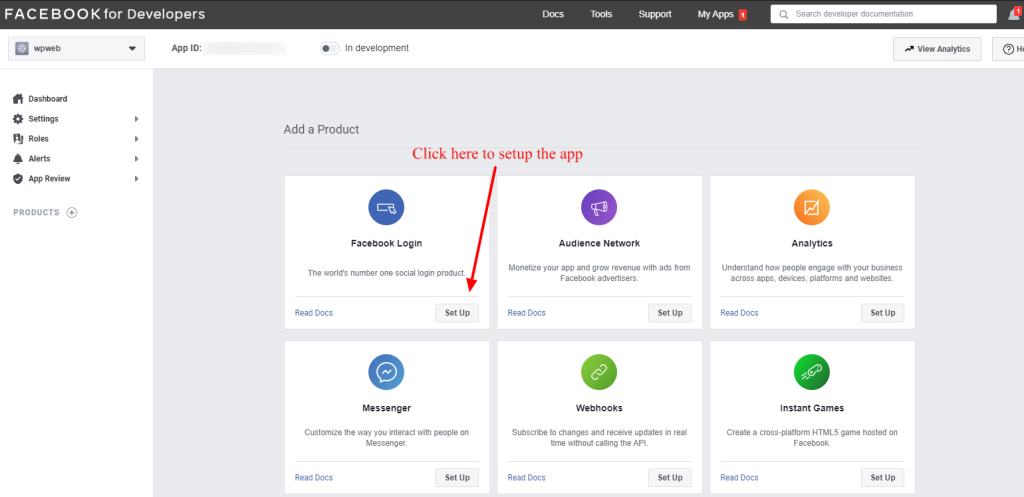
Step 3:
Now it will redirect to the “Add Product” page and in this page click the “Set Up” button in “Facebook Login”.
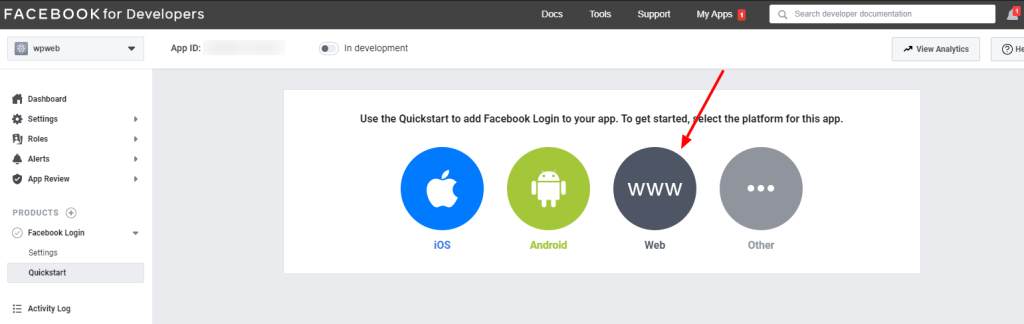
Step 4:
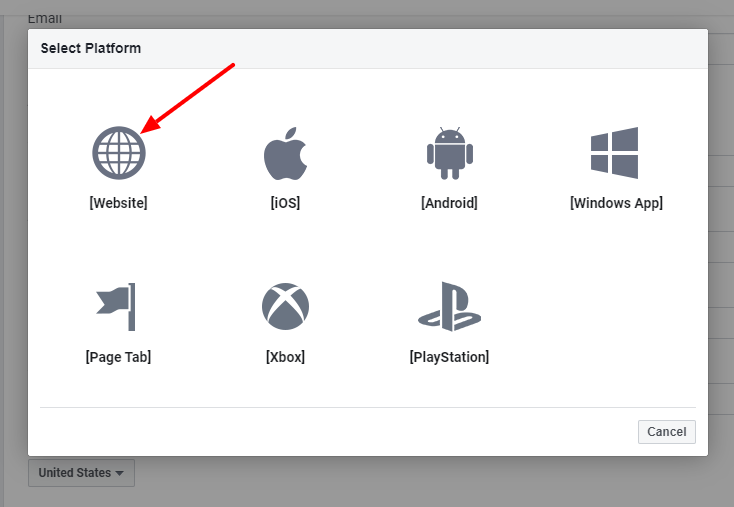
Click the “Web” button.
Step 5:
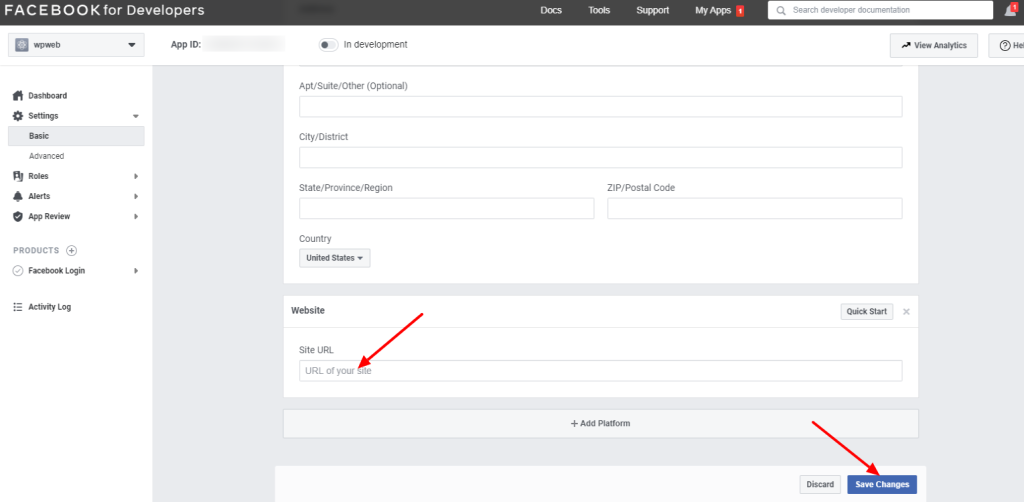
In the “Site URL” section add your site url and save it.
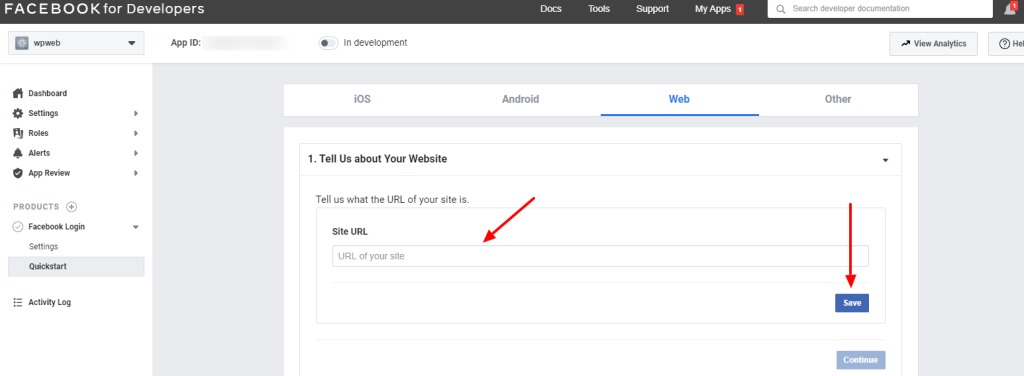
Then select the “website” as given below.
In this page you can add the site url and save it.
Step 6:
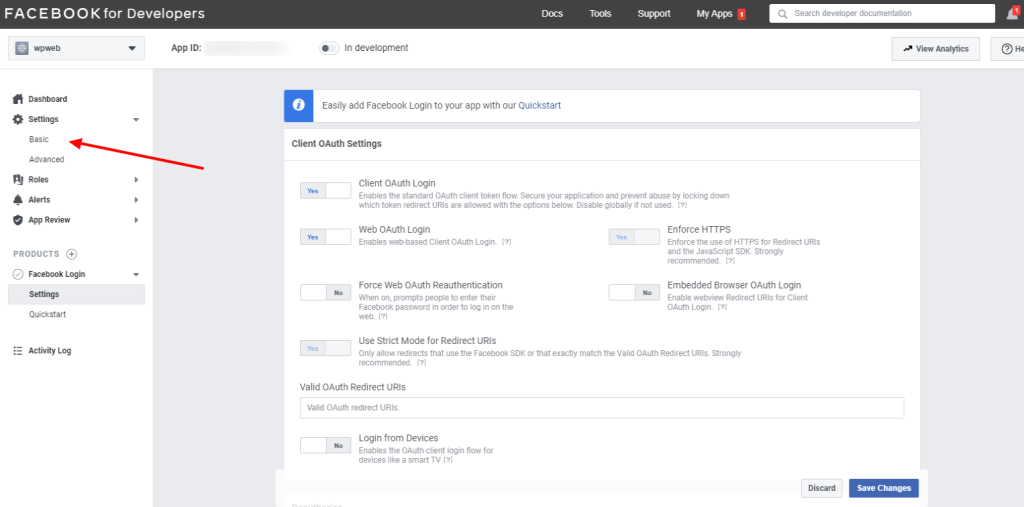
Click on the “Facebook Settings” as shown below. Here enter the “Valid OAuth redirect URIs”.
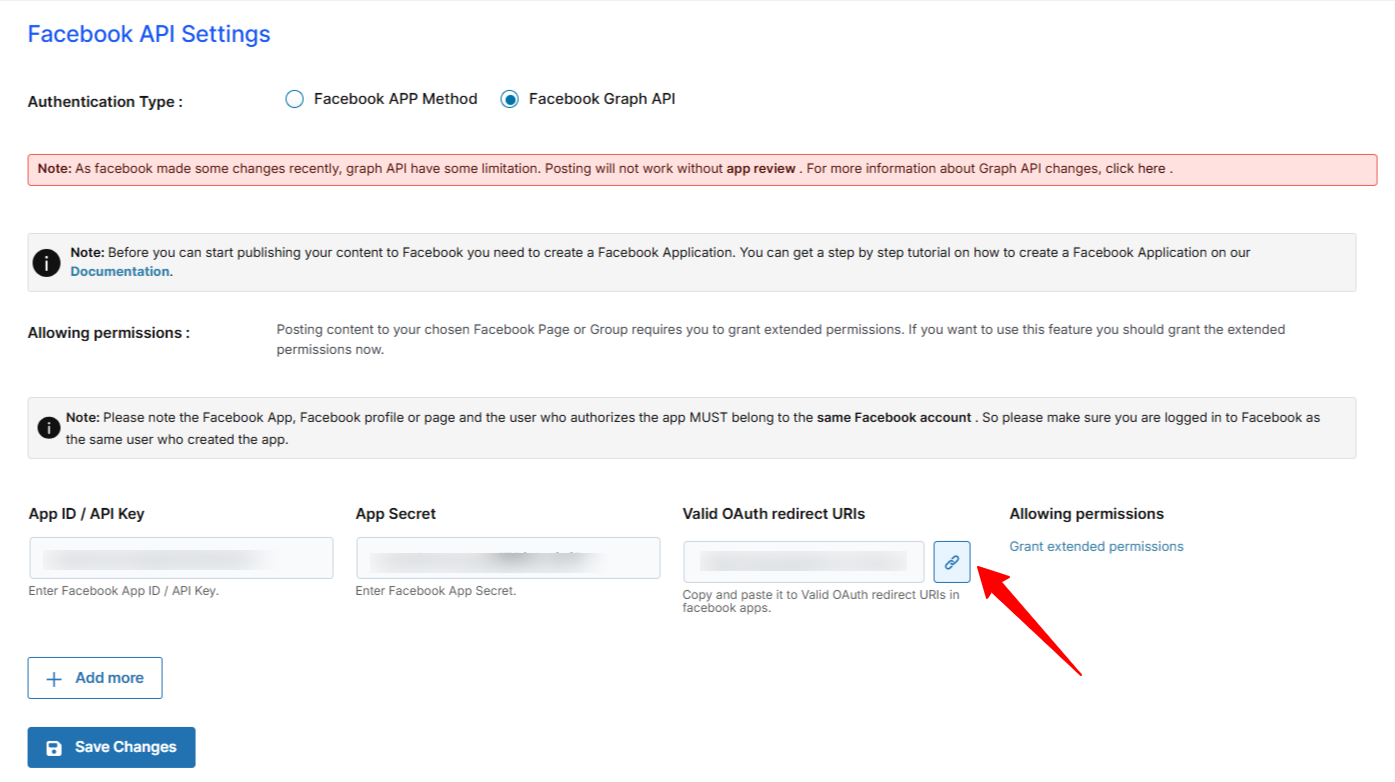
Please use this OAuth redirect URI in the Facebook settings.
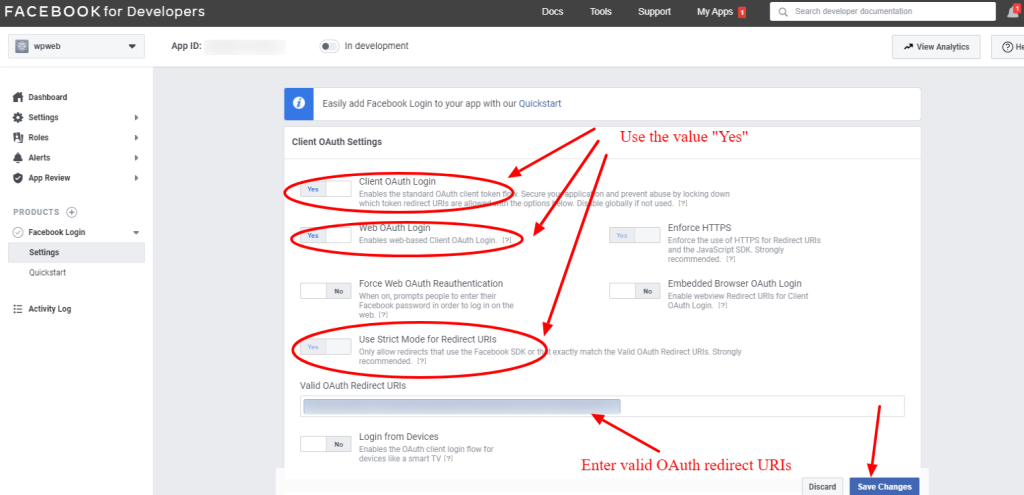
After entering the OAuth redirect URI and enable the “Client OAuth Login and Web OAuth Login”, please save the changes.
Step 7:
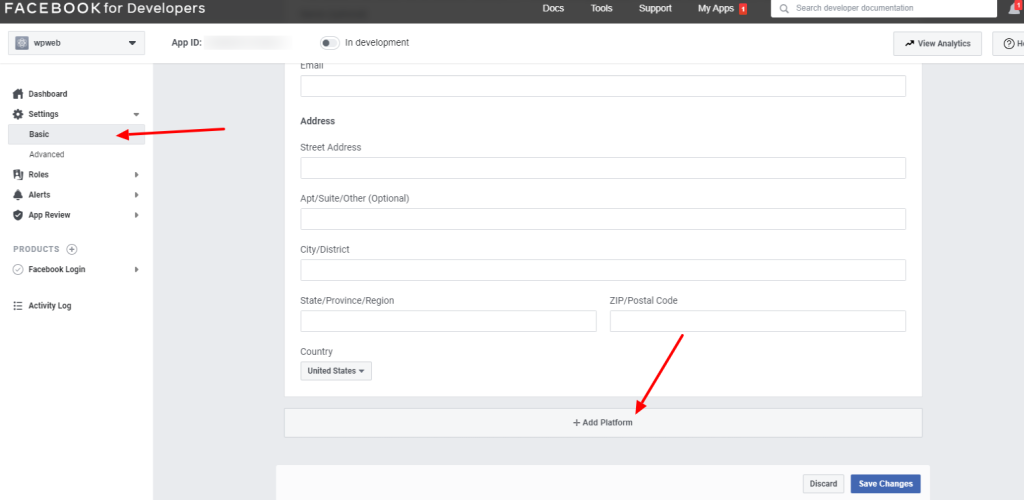
The app is ready now. Click the “Settings > Basic” link in the menu to see the app id and secret.
In the “Settings > Basic” we can see the App ID and App Secret.

The App ID and App Secret are now ready. Click the “Show”button to see the App Secret. (The app secret is in alphanumeric and DON’T use ******* as App Secret.)
Step 8:
Here the app is in development mode. Only the developer can view the posts now.
We need to “submit the app for approval” and after the app get approved, we can make the app public and the users can see the posts in the facebook.
The App Review Process Submission is given below.
1: First of all, individual OR business verification is necessary to got app approval. As you are an end user of the plugin, you have to do individual verification for the app. Simple steps you can found here.
Once individual verification done, you will receive verified badge like the screenshot below:

2: Go to “App Review” > “Permission and Features” menu
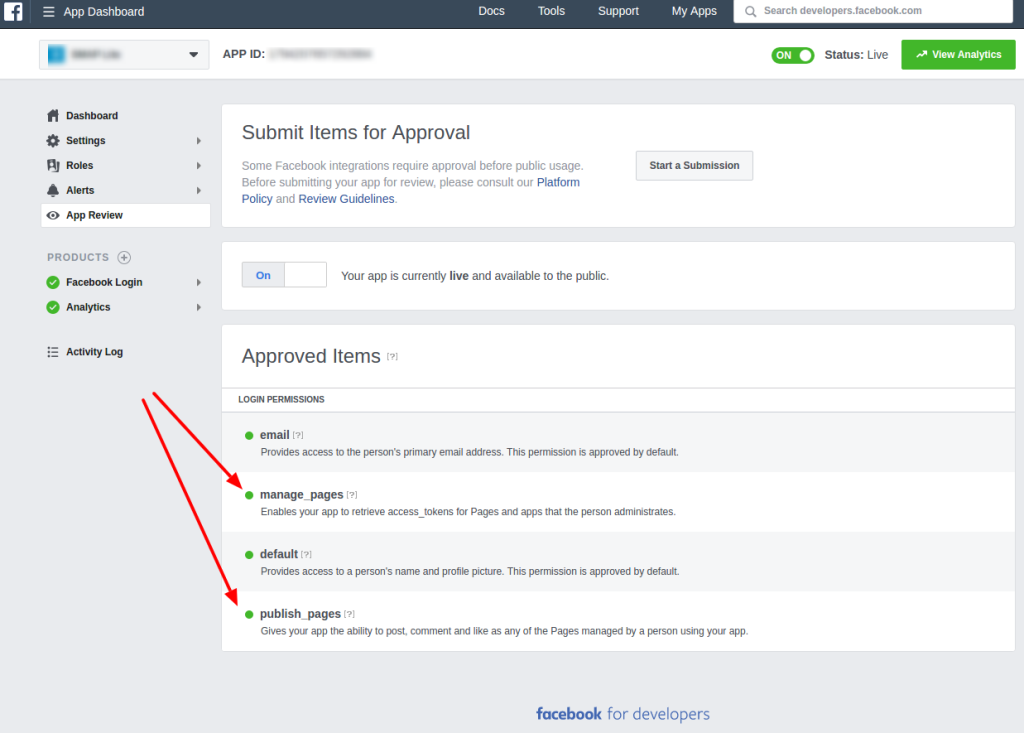
3: Find ( business_management, pages_show_list, pages_read_user_content, pages_manage_metadata, pages_read_engagement, pages_manage_posts ) permissions and click the “Request” button in front of each one.
4. Click the “Continue the Request” button. Fill the form for each permission, and send your App to review. You need to wait up to 5 days. A random Facebook worker will review it. If that worker does not have knowledge about plugins or WordPress, he does not review your request properly and declines it. Please try to re-submit the same request again.
Step 9:
After reviewed by Facebook, they will ask for enter the business details. (At the time of app submission this option is not available. We can see this after the review of Facebook)
Once the app get approved, you can see the permissions approved with a green bubble under the “Approved Items”.
Now make the app “Live”
To make the app ‘Live/Public’, please go to the ‘App Review‘ page.
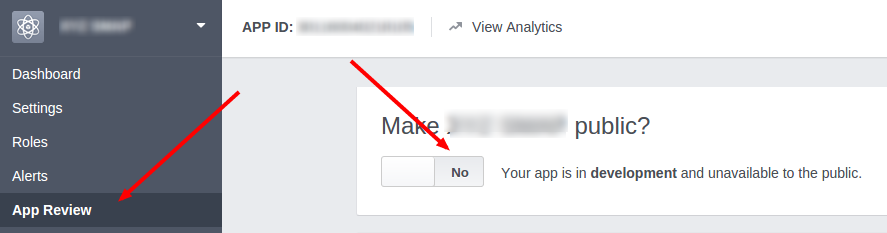
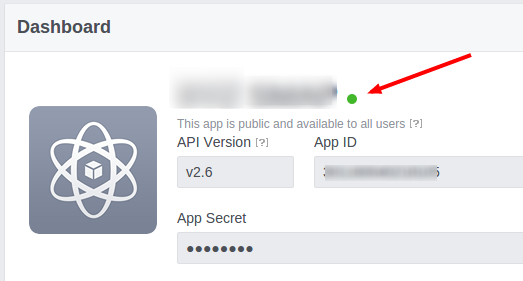
In this page please select the ‘Live/Public’ mode by selecting the ‘YES’ button and a ‘green indicator’ will display next to the app name as in the below image.
You can now use the Facebook app keys in the plugin.
Now enter these keys in the plugin settings in your site.
After entering the keys in the Facebook settings page, you need to “Authorize” the account.
You can see the FB pages in the settings page only after authorizing FB account.
When you click on the “Authorize” button, it will redirect to a facebook popup dialog box.
Step 1:

There is some warnings and you can ignore the warning and click the “OK” button.
Step 2:
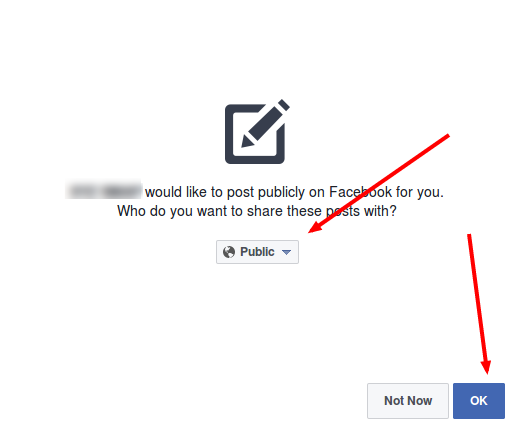
Select the “Public” option and click OK.
Step 3:
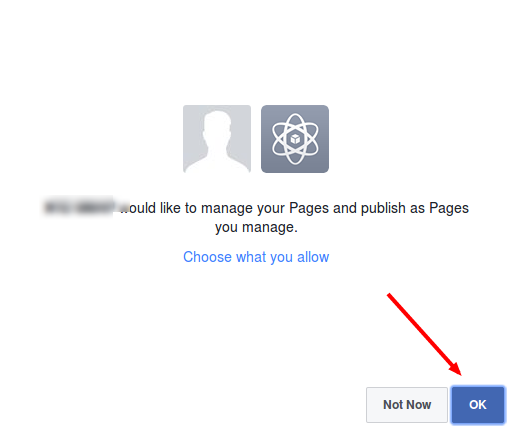
In the step 3 click OK and the authorization is complete.
Now you can see all your fb pages and you can select the fb page to auto publish.

Note: If you are doing group posting, you have to add your Facebook app within that group on which you are posting. Follow the steps mentioned in the link here.